Channels
A channel is the core integration unit in Mirth Connect. It receives messages from a source connector, optionally filters and transforms them, and delivers them through one or more destination connectors.
Channel list
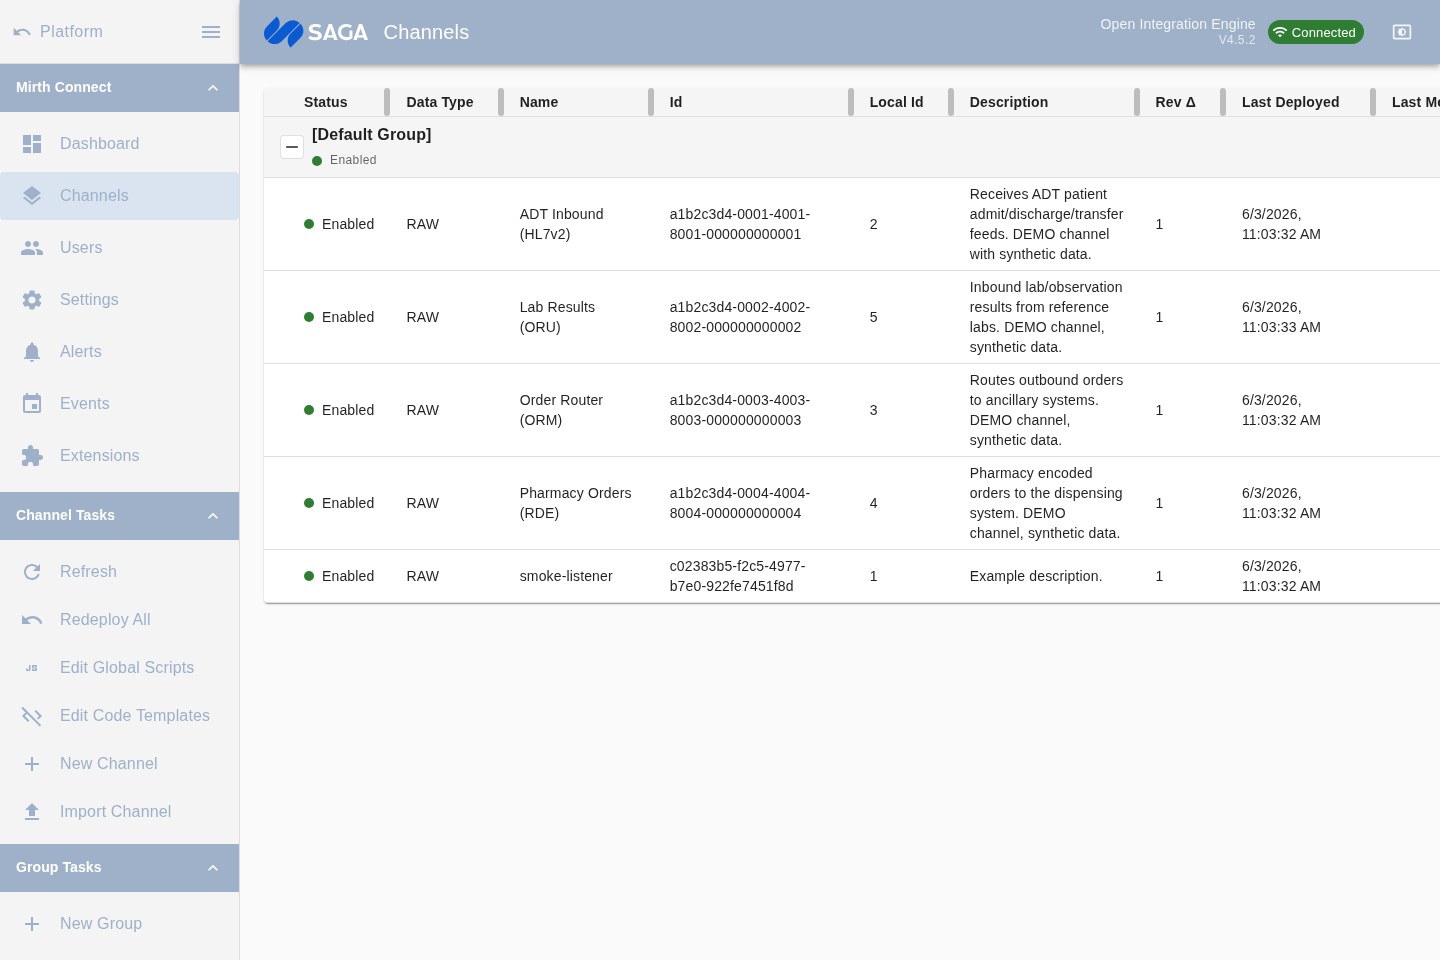
Section titled “Channel list”Go to Channels in the sidebar to see every channel defined on the server. Channels are grouped, with columns for status, data type, name, ID, local ID, description, revision delta, last deployed date, and last modified date.
Select a channel row to act on it. Create a new channel with the + button in the toolbar.
Channel editor
Section titled “Channel editor”Double-click a channel (or open it from the list) to enter the editor. The editor has four tabs:
Summary tab
Section titled “Summary tab”Set the channel’s name, description, data type (e.g. HL7 v2.x, DICOM, JSON, XML), and initial enabled/disabled state.
Source tab
Section titled “Source tab”Configure the source connector — the inbound endpoint that brings messages into the channel. Select a connector type (see below), then fill in the transport-specific settings such as host, port, encoding, and queue behavior.
Source connector types include:
- Channel Reader
- TCP Listener (MLLP)
- HTTP Listener
- File Reader
- Database Reader
- DICOM Listener
- Gateway Listener (P2P tunnel — requires the Gateway Connector plugin)
- JMS, Web Service, JavaScript, and others
Each connector type has its own settings panel. Most include a Listening Settings section for host/port and a Message Settings section for data type and encoding.
Destinations tab
Section titled “Destinations tab”Configure one or more destination connectors — the outbound endpoints that deliver processed messages. Click Add to add a destination.
Destination connector types include:
- Channel Writer
- TCP Sender (MLLP)
- HTTP Sender
- File Writer
- Database Writer
- DICOM Sender
- Gateway Sender (P2P tunnel — requires the Gateway Connector plugin)
- SMTP, JMS, Web Service, JavaScript, Document Writer, and others
Each destination has its own Filter and Transformer that run after the channel-level transformations. See Filters & Transformers.
Scripts tab
Section titled “Scripts tab”Add optional JavaScript that runs at channel lifecycle points: Deploy, Undeploy, Preprocessor, and Postprocessor. The badge on the Scripts tab shows how many scripts are currently defined.
Deploying and undeploying
Section titled “Deploying and undeploying”After saving changes to a channel, deploy it so the server activates it. You can deploy from the channel editor or by right-clicking the channel in the list or on the Dashboard.
- Deploy — activates the channel with the current saved configuration.
- Undeploy — removes the channel from runtime without deleting it.
An undeployed channel does not appear in the Dashboard’s started/stopped counters.
Enabling and disabling
Section titled “Enabling and disabling”A channel can be enabled (will start on deploy) or disabled (will not start on deploy). Toggle this in the Summary tab. Disabling a channel does not stop it if it is already running.
Importing and exporting
Section titled “Importing and exporting”Use the sidebar actions to import a channel from a .xml file or export the selected channel. Export operates on one channel at a time and downloads a plain channel XML file. To export code template libraries, use the Export All Libraries task in the Code Templates section instead.
You can assign color-coded tags to channels to help organize large deployments. Tags appear on the Dashboard and the channel list. Manage available tags in Settings → Tags.